
Tips for Filming Whiteboard Presentations
Whiteboard presentations are a great way to easily communicate advanced ideas and engage your audience. Sure kid, but what isn’t so great is lighting for whiteboard presentations. No bulls-eyeing womp rats here. In fact, sometimes filming a presentation on a whiteboard can be like listening to a self-entitled princess micromanaging your ship. Needless to say, we get a lot of people writing in and asking about our WBF gear, so here it is!
(One caveat: I cannot take credit for the current WBF setup. The lighting was already professionally set up before I joined the Moz team.) Let's dive right in!
Lights
Lighting is the most important aspect of our setup. The mission of our lighting setup is threefold:
- Light the presenter
- Light the whiteboard
- Eiminate shadows
Sounds easy enough, right? Whoa! Don’t get ahead of yourself, kid. Too much light directly on the Whiteboard will create glare; too little light and the actor will cast a distracting shadow over their content. The best way to get even light is by using lights with softboxes.
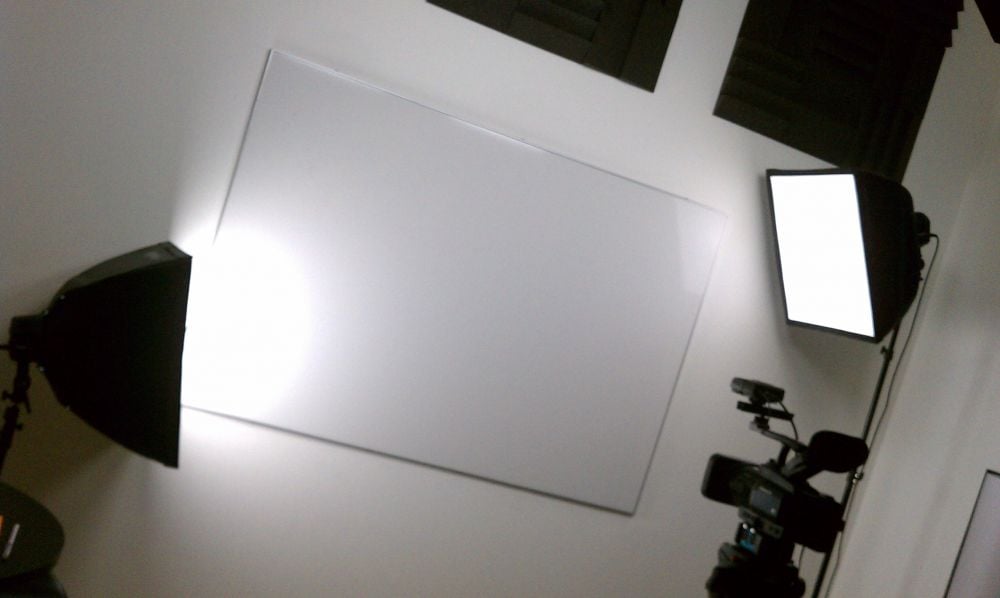
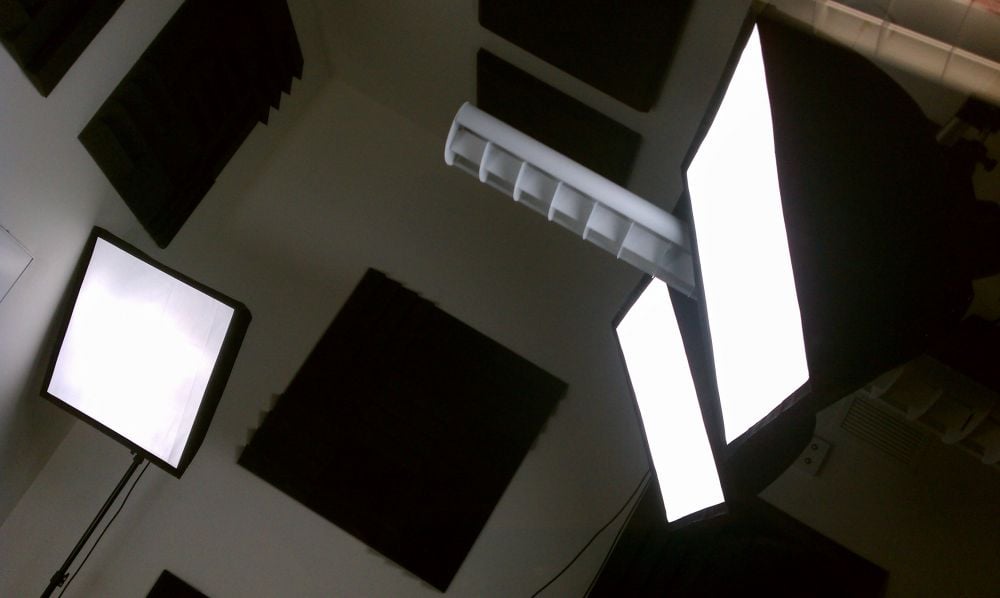
Most people ask Rand what camera we use for WBF, but they really should be asking about our lighting setup. We use four lights with soft boxes. The camera is important, but you should spend most of your time on lighting. Just remember hokey cameras and ancient microphones are no match for a good lighting kit at your side, kid.
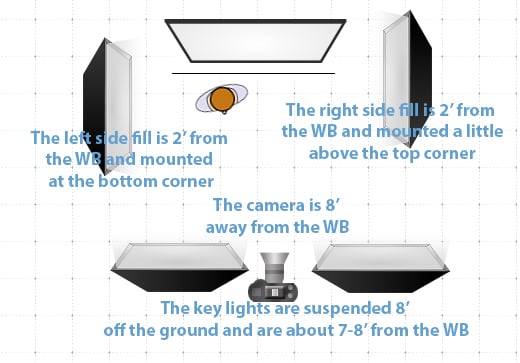
You can see what Moz's lighting setup looks like from my advanced and very technical schematics:
We have two lights mounted about 3 feet above and 6-7 feet away from the whiteboard. Mounting the lights above and back will light your presenter as well as cast less shadows on the whiteboard. We have another two lights on the left and right side of the whiteboard to provide an even, fill light across the board, which should eliminate any left over shadows. You will have to test how far to stage your lights from the whiteboard based on any reflections or glares. I recently found that you get an even look if you place your lights in the bottom corner and the top corner on opposite sides. This can also reduce glare. Again, all of this takes some fine-tuning, so you will need to experiment until you find the perfect placement. But don’t get cocky, kid.
Camera
I would suggest any prosumer camcorder (price ranges vary), but if you use your lights well, then you can go skimpy on the camera. At Moz, we have a pretty spendy Panasonic camera. If your latest smuggling runs aren’t producing enough to keep the Hutts off your back and you’re afraid to shoot first, then you can go for something a bit cheaper.
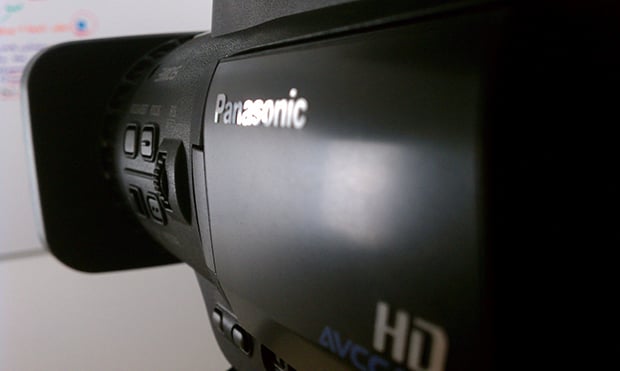
The features you should look for in cameras include:
- Iris control
- A manual focus ring
- Zebra lines
Iris control will allow you to manually open or close the lens to regulate the brightness and darkness of the scene. A manual focus ring will let you set focus either to the whiteboard or the presenter. This is important because automatic focus functions get confused with expansive white spaces and can ruin your shots. The zebra lines will help you see what is overexposed or blown out. This is a great way to see if your iris is at the perfect spot. Always remember to practice with your camera because filming isn’t like dusting crops or moister farming.
Sound
Sound is fairly important for whiteboard presentations. I would say your sound quality is more significant than your video quality as people are more likely to turn off a video because of bad audio over subpar cinematography. For our sound recording, we use Sennheiser lavs, which are a bit pricey, but the price is well worth it for great audio.
You want sound that will isolate your presenter’s voice and eliminate background interference. Isolated sound is also a must if you have bantering protocol droid roaming around the office. Again, if you’re low on credits, just go cheaper with other brands likes Azden or Audio-Techina. Make sure your lavs have at least two frequencies to avoid interference from your hyperdrive (you wouldn’t want to warp into a sun or a supernova). If you want to get the lower-end lavs or microphones, you should look into some audio/video editing programs that let you clean up hums, noise, and interference. Use Audacity to accomplish some crisp audio, but don’t get any delusions of grandeur. There are some other great editing programs out there.
Editing
We were using iMovie for WBF, but we recently switched to Adobe Premiere. The reason for the switch was to take advantage of the amazing color correction tools. This is essential in keeping the WB balanced and white instead of reddish, yellowish, or bluish. Use any robust editing program if you are having trouble with color temperature and you can’t seem to fix with lighting or camera settings. With practice, you can make that whiteboard look almost as sleek as the Millennium Falcon.
Studio
If you want to regularly publish whiteboard content, then you should look into creating a studio. Make sure the room is at least 20’x20’ so you have enough room to experiment with different lighting schemes. Remember what I said about sound, kid? Well, you should probably put some sound deadening panels on the walls. Wait, won’t that make my converted studio ugly? Not so fast—there is such a thing as sound deadening wall art! Bet you didn’t see that one coming.
Host
Looking for an amazing host? Look no further, because Wistia has you covered. Wistia offers excellent compression options, comprehensive analytics, world-class customer service, and a blog that is more addictive than Coruscant death-sticks. Oh, and they also let you add your videos directly to a sitemap for excellent indexing opportunities. If that isn’t enough to get you signed up for Wistia, then maybe this will: if you are a PRO member, you get an awesome discount!
Transcriptions
Any Whiteboard Friday fan knows we have nifty transcriptions below each video. Not only are these great for the hard of hearing, they are also great for SEO. We use Speechpad because they have an easy upload process and their turnaround is amazingly fast. Don’t get any ideas; they’ve got nothing on the Falcon, but they can blow any Star Destroyer out of the sector.
Non-lizard brained creature
Don’t try getting some rodian or trandoshan to shoot your presentations. I would also stay away from any Fetts. I recommend finding someone who has experience with cameras to shoot the presentations. If there are any bumps in the road, an experienced filmer will have the knowledge to correct the issue. If you don’t know anything about shooting video, here are some great materials to get you started:
- The first thing you want to read is The Bare Bones Camera Course for Film and Video. This book is one of the greatest resources I’ve seen for a quick and comprehensive intro to shooting video.
- Then, you will want to learn about color temperature and white balance.
- Next, you will want to learn how sound works.
- The last thing you should learn is the best export settings for your video hosting. If you don’t have an awesome host like Wistia, then you will need to compress your video correctly to avoid host compression settings.
Last but not least, you should definitely thank the people who make Whiteboard Fridays come to life. Give Kenny, Aaron, Casey, Joel and Abe a huge round of applause for making WBF happen every week!
Think you can film a whiteboard presentation now? Well good luck, kid. Oh yeah, and may the force be with you.

![How to Create an SEO Forecast [Free Template Included] — Whiteboard Friday](https://moz.rankious.com/_moz/images/blog/banners/WBF-SEOForecasting-Blog_Header.png?w=580&h=196&auto=compress%2Cformat&fit=crop&dm=1694010279&s=1a76a7c52ec3cdfe4e321bf5dae6894e)


Comments
Please keep your comments TAGFEE by following the community etiquette
Comments are closed. Got a burning question? Head to our Q&A section to start a new conversation.